
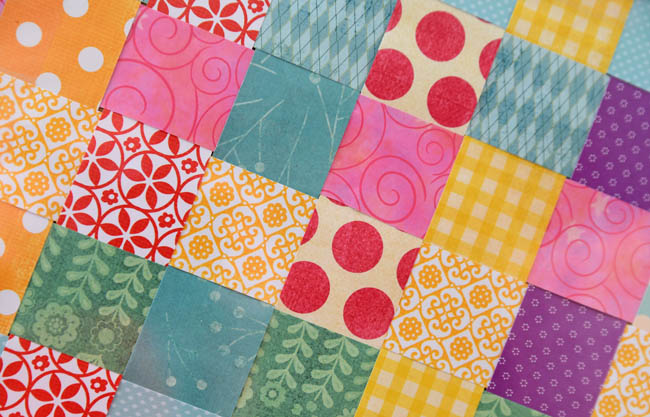
 I decided I wanted one with a grid of colorful squares but didn’t want the hassle of carefully measuring and gluing down many small squares, so I wove 1-1/2 inch strips just like we all did in grade school (see below).
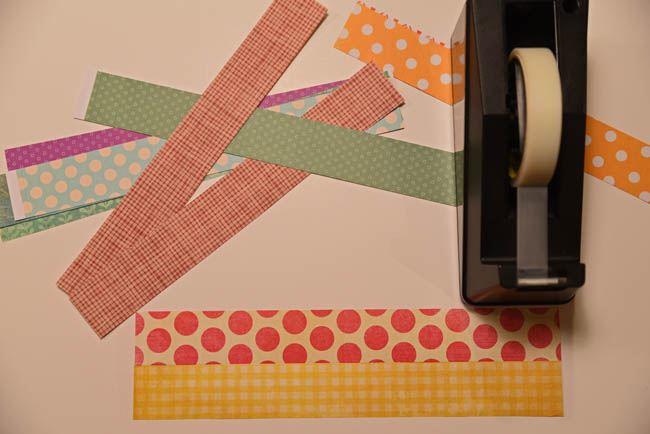
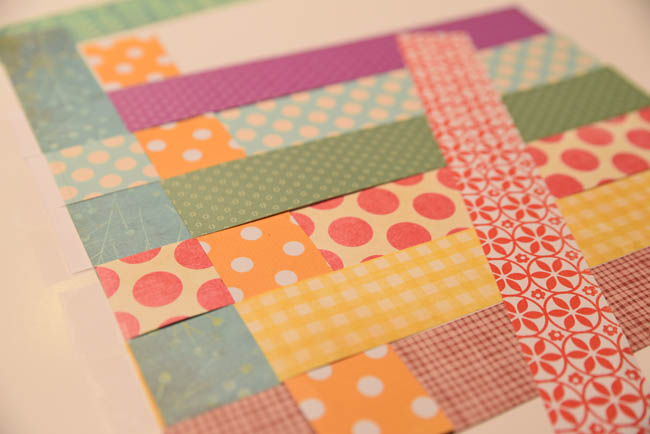 Secure the edges with scotch tape, weave the pieces together, then trim the woven piece to fit nicely behind the frame’s mat and secure with masking tape. I suggest positioning at an angle in the frame (see the first picture above), so you don’t need to worry about all of the edges being perfectly square.
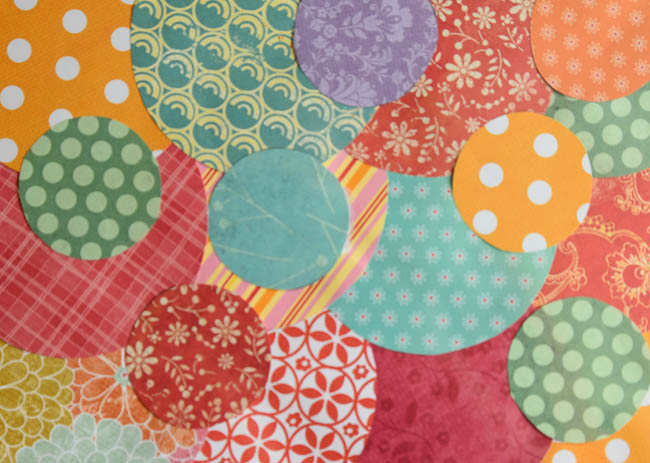
To add a contrast to the straight edges in the first two pieces, I cut out circles after tracing simple objects (a roll of scotch tape, the bottom of a small Mason jar) and layered them to completely cover the background piece (I used a sheet of tag board). The smaller circles overlapping the larger ones added nice dimension. To secure the pieces, I recommend using the adhesive film that is used for scrap booking. It eliminates the puckers often caused by wet glues.
Reality Check. I fear I may be losing your attention with the seemingly never-ending projects stemming from the one pack of craft paper. The pack can’t last forever, I promise. ( :
Lynette
Change language
Send
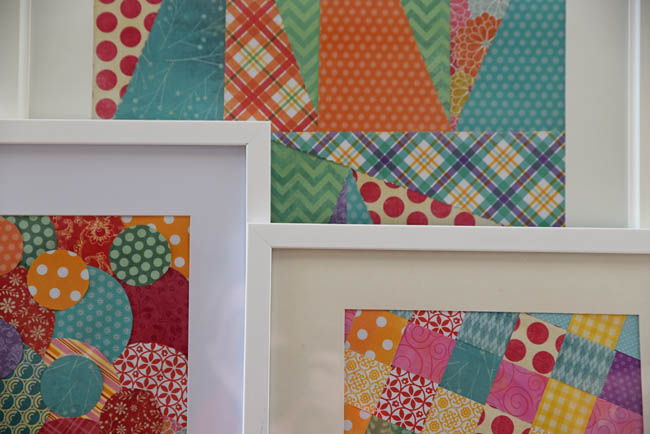
We are about to make the big change in Ella’s room moving from her crib to a big girl bed and changing out some of the baby items in here room. Those three years flew by. Luckily, I decorated her nursery in a bit of a non traditional fashion for a nursery so the bigger decorative items like drapes and pillows can be used for the next stage. One of the things on my list was to add new artwork to her room. These three pieces of paper artwork fit the bill.
When ones buys a whole coordinated bundle of scrap book paper for a single project, there is bound to be great plenty leftover for more craft projects. That is just what has happened with the grouping I bought the the Lake Like sign I did for our cabin (link back). I had enough paper to make the Happy Birthday banner for Ell’s third birthday last fall. I returned to that same stash to put together three very inexpensive art pieces using the larger scraps from the banner for the larger piece of artwork and bits and pieces for the two smaller pieces. I decided I wanted one with a grid of colorful squares but didn’t want the hassle of careful measuring and gluing down many small squares so I wove 1-1/2 inch strips just like we all did in grade school. My first inclination was to place the mat on perpendicular and parallel to the straight edges of the woven strips which was cute but when I turned the mat a bit, I think the piece came to life. Simple trim the woven piece to fit nicely behind the mat and secure with masking tape. Assemble the mat, frame and backing and you have a pretty terrific piece of fun and colorful art.
To add a contrast to the straight edges in the first two pieces, I used circles and layering and overlapping them to completely cover the background piece. A few smaller circles added a little more dimension. I use the adhesive film that is used for scrap booking. It eliminates the puckers often caused by wet glues.
These projects are so fast and almost mess free and it does feel good to use materials I had on hand. The frames are from Ikea and Menards.
Reply to Lynette <lynette@thimbleberries.com>
Forward
Lynette
Change language
Send