
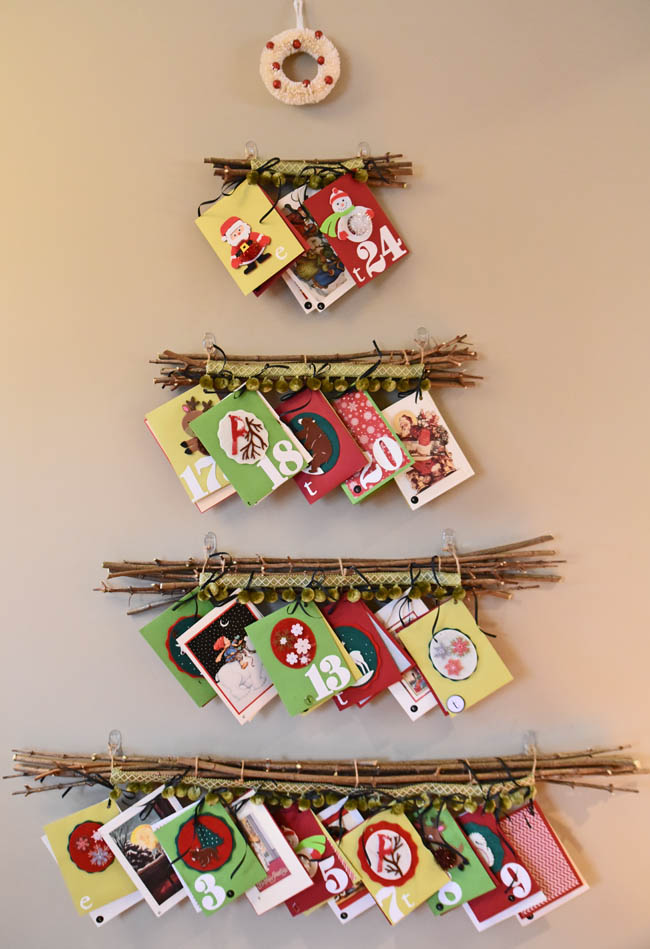
I know, I know, we haven’t even passed Thanksgiving yet and I’m moving to a Christmas project. Plus, I’m messing up the order of the posts by going with the DIY/Décor theme today instead of Friday. All for good reason. This is a great alternative to a traditional advent calendar, and a fun project to work on over the Thanksgiving holiday weekend. This will be the first year we’ve done such a calendar at the Olson house, and I wanted to find a different angle than candy or chocolates, since my son doesn’t like either (I have no idea where he gets that). I also wanted to think of a way where the calendar could have a high visual impact as a holiday decoration throughout the month (in other words, not look barren once the kiddos nab their goodies). With this approach, the kids can untie their envelopes each morning, get their treats, and I can replace the envelope back on the “tree.” I also hope that if we’re careful, we can re-use the calendar for future years. I love how this turned out and although this doesn’t fall into the category of quick and easy as with most of my DIY projects (not that it’s difficult, but it does take some time), it’s well worth the effort. Thanks to my mom, this blog post about showcasing Christmas cards, and a random Ikea display I spotted the other night, all of which gave me the inspiration for the final product! This one is done with the kiddos in mind, but I think it would look striking and give it a more modern feel with all white envelopes – perfect for a couple without kids or empty nesters. What a great way to give little tokens of appreciation to each other throughout the month!
 (more…)
Archive of ‘Decor & DIY’ category
Turning Kids’ Art into a Holiday Keepsake
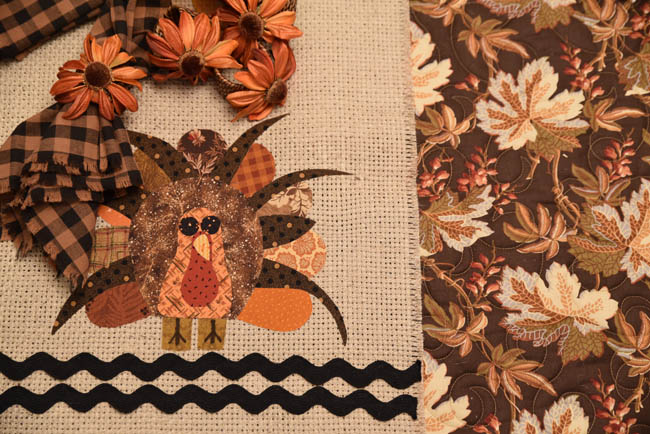
The cute factor in kids’ artwork this time of year definitely gets taken up a notch, as they come home each day from school with a different rendition of a pumpkin, turkey or Christmas tree. All of them are darling in their own way, yet nearly all of them get lost in the shuffle of paperwork on the kitchen counter or in a pile in the mudroom. I’m often looking for ways to keep some of their special things, especially if crafted at home or, like this little gobbler, with grandma. Taylor and my mom drew and colored this turkey, and my mom and I decided to add it to the rotation of holiday décor by putting it on a table runner, using a DIY process that is quick and easy (steps included below).
Bringing The Outdoors In For The Holidays
Finding time to decorate for the holidays can be difficult, especially when juggling it with kids’ school activities, year-end responsibilities at the office, and an active social calendar (even Trevor and I seem to be out and about more in these months, and that’s saying somethin’). Add the strain on the wallet this time of year, and getting house and home looking festive can be a challenge in more ways than one. When I decorate (and I admit there have been years, especially when the kids were really small, that I completely abandoned it) I need it to be efficient, impactful, and last throughout the holiday season. Sure, Santa images make an appearance around Christmas, but for the most part the décor definitely needs to be appropriate for several months to make it worth the time and effort.
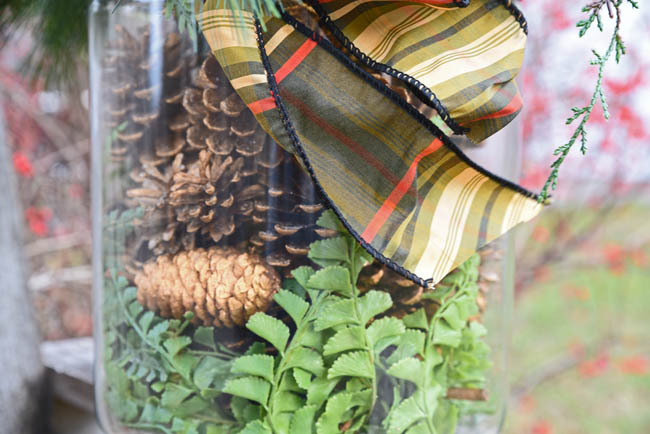
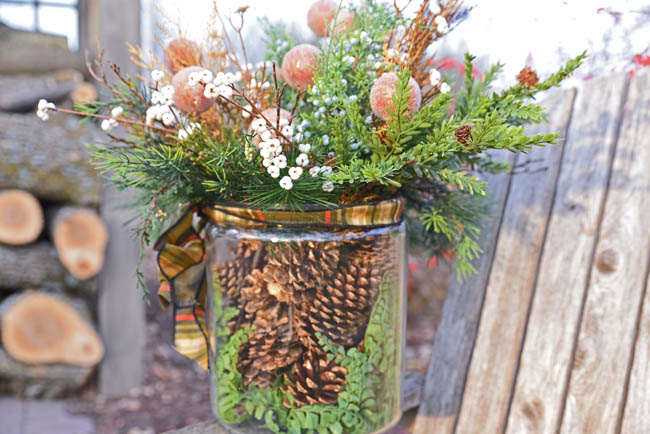 For the last couple of years I’ve used things from our yard to help round out holiday decorating – red twigs from dogwoods, branches from birch trees, and dried hydrangea blossoms. I can run outside and grab them when I have a few moments free (I’m much more likely to do that than I am to get in the car on a weekend and deal with holiday crowds). Plus, you can’t beat the price. This year I added pine cones to the mix. Spraying pine cones with metallic paint is super easy, helps preserve them, and adds some interesting dimension. For this arrangement, the pine cones were placed around the perimeter of a glass apothecary jar, artfully hiding the stems of the greenery and other items placed inside.
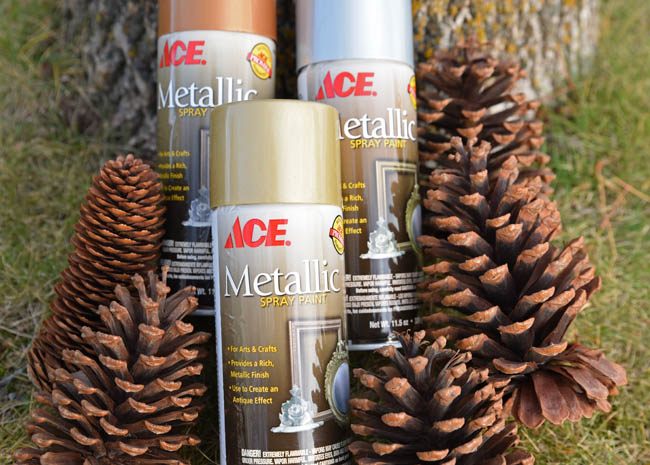
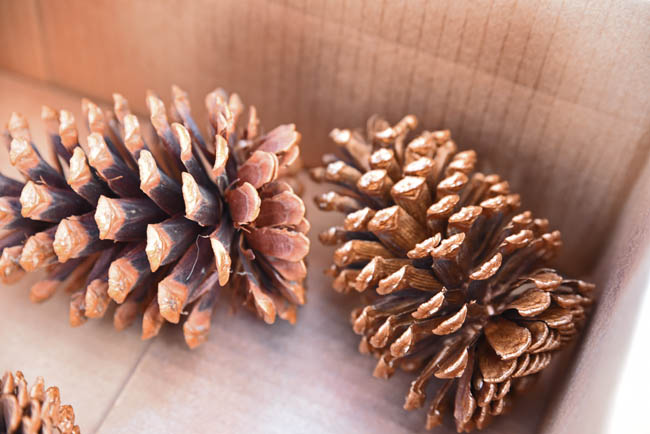 Prevent overspray – create your own “spray booth” by placing the pine cones in a medium to large cardboard box. This method helps the process go quickly, as you can allow an application to dry a bit and then shake up the pine cones and apply another coat at a different angle. Particularly if you are using a mix of paint colors, you don’t need the application to be perfectly even.
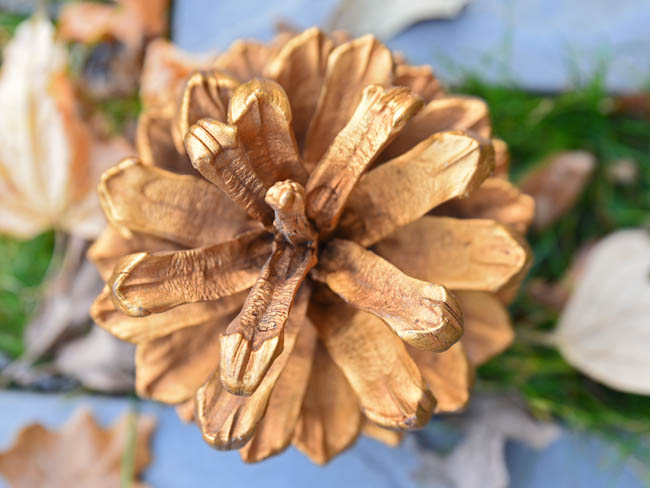 Applying a single gold color makes for a striking look.
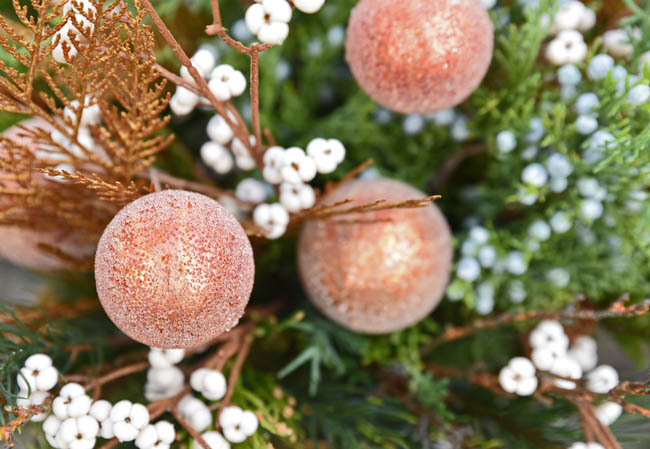
I don’t suppose anyone’s preference is for artificial rather than natural, but if you want arrangements to last for more than a week, you don’t really have a choice. Avoid the “fake flower” look by using some unusual items such as tallow berries and marmalade-hued globes, as shown above.
Reality Check. For this post I had planned to have the items I mention in the intro – red twigs, birch tree branches and hydrangea blossoms – as part of various arrangements throughout the house (for us to enjoy) and the subject of lovely photos (to share with you). Then it snowed 10 inches. On November 9th.